Sous Vide Que combines three techniques to make one delicious rack of ribs!
Have you ever heard of sous vide que?
You may have heard of sous vide cooking.
It's cooking at a specific temperature in a water bath. The food is sealed under vacuum. Hence Sous Vide.
Doing sous vide que takes things one step further using the backyard barbecue to add texture, flavor, and color to the final product.
You may ask yourself if these steps and this method is worth the effort. I am very happy with the way my ribs turn out and I can achieve my desired results with consistency now that I have made ribs dozens of times. My thought on this cook was that the journey is part of the fun. Today's journey involved combining three techniques or sous vide que.
Step one: Sous Vide
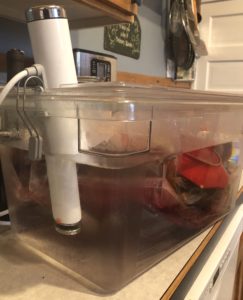
Rack 1 I season traditionally. I use Alpine Touch seasoning for salt and garlic flavors and the Code 3 Spices Sweet and Zesty 5-0 rub for enhancing the natural pork flavor.
Rack 2 was simply seasoned on both sides with an entire packet of NOH Char Siu seasoning mix.
One of these times I will try this coffee dry rub on the ribs but not today.
I cut the racks in half so all four sections will fit into individual food sealer bags and seal up tightly in the FoodSaver.
When the Joule notified me that the water bath was up to temperature I added the bags of ribs and set the timer for four hours.
 Step two: chill
After the ribs cooked for four hours, I dumped the hot water and replaced it with an ice water bath and in the ribs went for an hour to chill. After an hour, the fats and liquids in the bags had solidified. I removed the ribs from the bags but kept the juice or purge from both batches which I reduced to make a sauce for the Char Siu rack. Other than the purge from the bags, I added a little Sriracha to bring up the spice and reduced it by two thirds.
Step three: smoke
I fired up the Traeger Timberline to 195F and turned on the super smoke setting. The cold ribs went on to the smoker for an hour to pick up some smoky flavor which they clearly have in this short amount of time. At this point, I was getting as hungry as I was excited to see how the sous vide que would turn out.
Step four: grill
You can set the Traeger Timberline grill to cook at any temperature you desire between 180F and 500F.
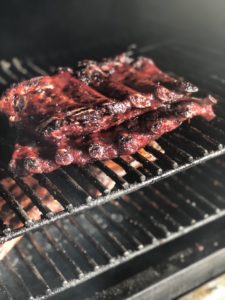
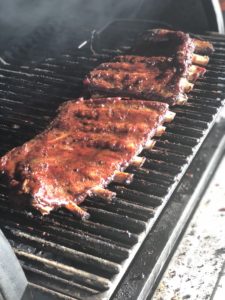
To grill the ribs, I set the Traeger to 450F and grilled the racks for about 30 minutes.
My objective was two-fold- to promote browning and bark, and to set the sauces. After the ribs grilled for about 20 minutes, the Char Siu ribs were painted with the sous vide purge I had reduced and the other rack was sauced with Code 3 Spices Patriot Sauce.
When you use a sauce on grilled food, there is always the chance of sugars in the sauce burning.
So keep a close eye on the ribs. Pull them off the grill when the sauce sets up to your liking.
The ribs looked and smelled delicious. One of the first things I noticed when I bit in was that the ribs were so hot. Piping hot. Because of the grilling step, the ribs are much hotter than cooking them at a lower temperature over a long period of time.
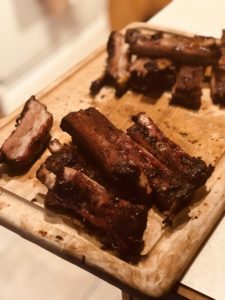
Both sets of ribs were delicious. The texture of the meat was exactly what I had desired. Crispy with a little bark and big punches of flavor from the grill and juicy from cooking in the water bath. They had the perfect amount of smoke which enhanced the flavor without being too overpowering.
Overall, the sous vide que method was a raging success. It even works well with beef short ribs!
I will not use this method every time I make ribs, but I will most definitely do this cook again.
 Step two: chill
Comments
No Comments